Thursday, May 10, 2018

Sweet Potatoes Chocolate Brownies


Hey everyone! It's been a while, and recently been so busy with my life drama and works and gym and business. Well, actually for the last year I'm just being lazy to blog.

And because of some reasons, I need to sort of improving my food photography skills, I did quite a lot of research and definitely from pinterst and youtube. And I found that dark food photography match my soul quite well. *nay just kidding.. or not.

I've been putting quite lots of interest on food photography these few months back, but since I'm quite lazy, I only snap it either on my dining table or with white fabrics laying on top of my dining table. Most of them are healthy food. You can check my healthy food highlights on my instagram page. I'm not promoting myself cause I'm guessing that most of you found this from my Instagram as well. It's just a reminder that I do had a lot of healthy recipe on my Instagram story. So this time, I put some more effort on the backgrounds and styling. And, here how it looks.


I would say that I'm still pretty bad at this, no proper camera (I took it with my OnePlus 5t phone camera), no proper equipment and so on. But thanks to adobe Lightroom, at least my pictures is still an okay for a beginner (yes, I am praising myself now).

Also quite recently, I am trying to diet again, or lets just call it eating healthy in order to cut down my weight. Since my lunch today got some boiled sweet potatoes, I decide to try to make this Sweet Potato Chocolate Brownies. Yes, it's chocolate peeps!! I'd be glad eating this tomorrow morning for breakfast cause it got some oatmeal flour, and flax seeds.
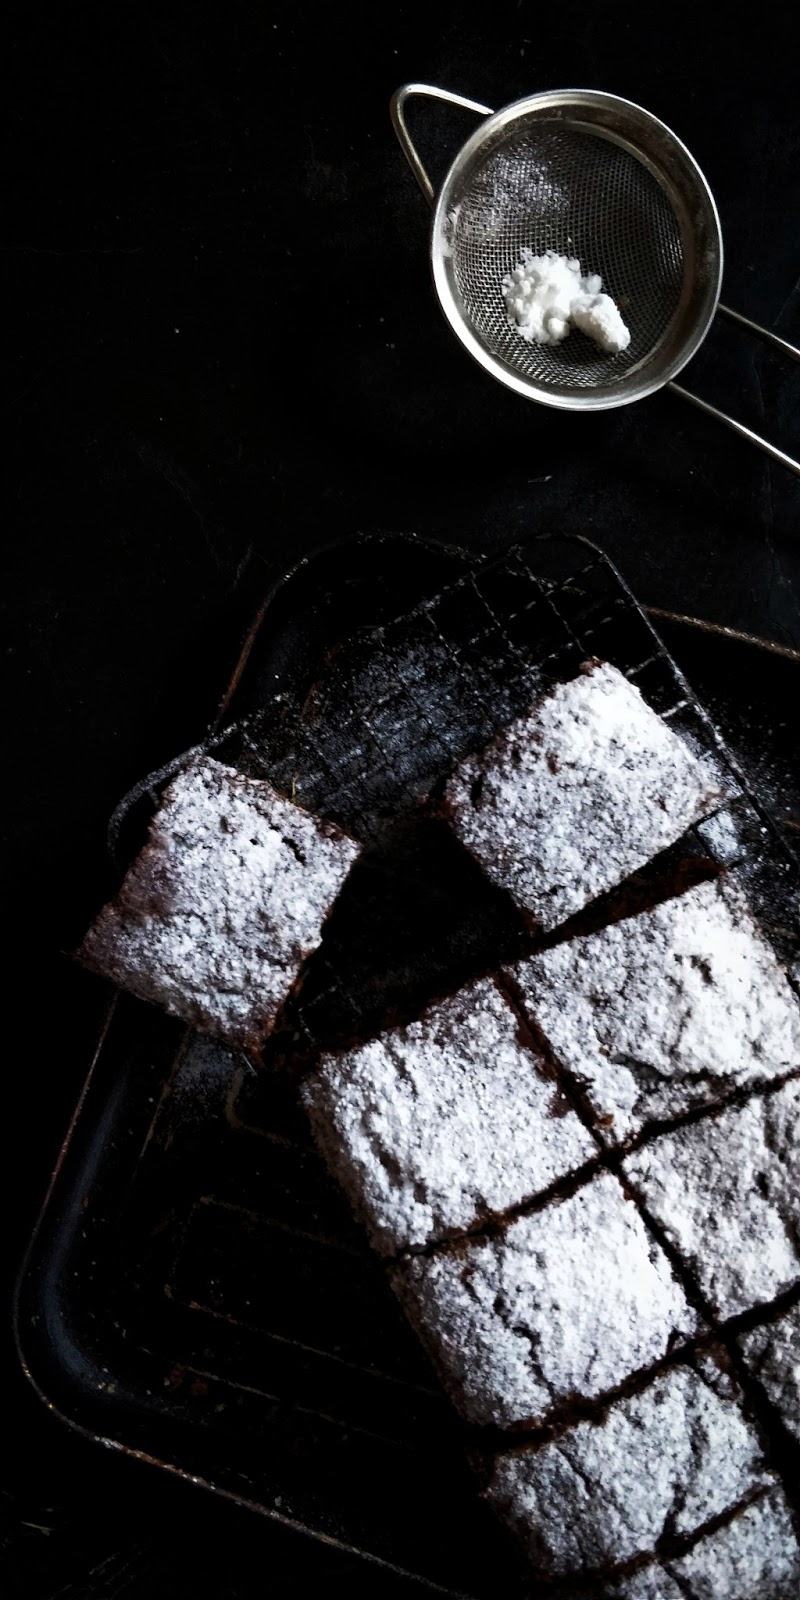
took this one on my family's black marble dinner table.
Cause it's the easiest and looks okay for me
I'll be honest, the brownies doesn't taste as good as sinful buttery chocolate brownies. But guess what, it taste good if you are on diet and been eating greens for the whole week. I won't say it's a cheat meal cause it got no oil nor butter nor sugar. The sweet potato and honey makes the brownie sweet enough for my likey. You can add additional stevia or maple syrup or more honey if you prefer it to be sweeter. Fyi, I dust it with powdered sugar just for picture purpose and you don't have to. I'm okay with extra calories for a better pictures tho. Cause, check how bad the picture is without all the pretty snowy powdered sugar. Anyway I think I've been eating too much msg before my diet, cause it takes me half hour to find the powdered sugar. But it's all worth it after seeing this picture comparison 

left or right?
So let's jump to the recipe cause some of you might just put interest on these lovely guilty free brownies and not to the photography (but hey its a bonus knowledge). But before that, I would like to make some notes for the brownies, I added some flaxseeds for the extra nutrition you can also add other superfood that you wish, such as nuts or any other seeds. And I would suggest you to use wider pan since it might turns out more crunchy cause mine turns a bit mushy.

Sweet Potato Chocolate Brownies

Ingredients
1 cup of oatmeal flour
3 eggs
1/4 cup of unsweetened cocoa powder
1/4 cup of honey (I used dates honey)
200 gr sweet potato puree (boiled and mashed)
3 tbsp of flaxseeds (optional)
handful of chocochips (optional)
1 tsp of espresso powder (optional)

Directions
-Preheat your oven 180c and prepare your brownie pan with baking paper
-Beat the eggs with honey
-Add the mashed sweet potatoes, mix well
-Add in the oat flour, flaxseeds, cocoa powder, chocohips and espresso powder
-Mix till it just combined
-Pour into prepared pan
-Bake for 30 minutes until skewer inserted in the center comes out clean


Hope everyone who are trying to lead a healthier life could try this. It might be hard in the beginning but at the end its all worth it. Some people might say that I restrict myself too much, but actually no. I do eat 'normal human' food as well. But when I could, I'd choose over something healthier or at least incorporate healthier choice on my daily meal. And for the brownies, I'll try to make a better version of it and will share it again to everyone. See you on the next post! (hopefully soon).

Thursday, November 12, 2015

Green Tea Pound Cake

Hi Hi,
It's been a long time since my latest update. Lots of things are happening and I feel like my brain is going to explode. I'm so confused between finding a normal 9 to 5 job or doing business or continue my study. I guess this is what 20 y.o crisis like.

I went seeking for job in Singapore for a month and since I'm not so patience person "Finding job isn't for me" that's what I think, so I'm giving up on finding job, and go back to my hometown and selling cakes online, the shop called La Vanille, Vanille in French means Vanilla (check out our ig by clicking the hyperlink). I'm not selling much but I'm happy still able to hold my whisk and playing with chocolate. So yeah, that's the story how I abandon my lovely blog here.


Okay, enough with my story. Let's jump to what I bake this week. It's a loaf of green tea pound cake (since I bought too much green tea and afraid that the smell will faded). I tried rasamalaysia's green tea pound cake but cut the white chocolate and red bean since I'm not  a big fan of them.


The pound cake turns out so fluffy and the sweetness is perfect for me even without the white chocolate. And what I should improve from my first trial is probably I need to double up the recipe since the it's not tall enough and maybe I should put a drop or two of green food coloring, because of the green tea color looks a bit dull for me and not so appealing.


Overall this cake is delish and perfect for green tea lovers.
Here's the recipe if you want to try it at home, and I've doubled up the recipe to make a perfect loaf cake.

Green Tea Pound Cake

makes 1 loaf | prep time: 15 min | bake time: 60 min
Recipe adapted and modified from rasamalaysia.com

Ingredients:

200gr Butter
200gr Powdered Sugar
4eggs - beaten
180gr Cake Flour
1tsp Baking Powder
3tbsp Green Tea Powder

Instructions:

1. Preheat oven to 170C (325F)
2. Lined 1 loaf pan with parchment paper
3. Combine together flour, green tea powder and baking powder, sift.
4. Beat butter and powdered sugar until pale and fluffy
5. Add in the beaten eggs a little at a time, beat for a minute.
6. Fold in the dry ingredients.
7. Pour the batter into prepared pan.
8. Bake for 60 min or until the toothpick inserted into the loaf comes out clean.


Wednesday, August 13, 2014

Beef and Parsley Spaghetti


Hey again! Here's my second post of this month. Hope I can post more frequently after busy with finding a job here in my small hometown. Hope you wish me luck. Hehe. Just realizing that finding a job is pretty hard. And they said I need to wait for few months even just for the Interview?! So, what am I going to do at home? Blogging I guess. Ok, Enough with my chit chat, now let's move to the real deal.

So this time I challenge myself to cook for my family. Actually I'm not really used to cook for my whole family since my mom usually take care of the table beautifully. And besides cook for the whole family that I'm not so used to, I also cook an Italian dish! I know, Spaghetti is so simple. But the problem is our taste bud.

As I grown in Asian family, our palate is already set to Chinese or Indonesian dishes. Yes, my mom always cook Chinese food all the time. The most western dish that my mom ever cooked is Tomato Spaghetti, which I think taste beautiful, even with the simplest ingredients like a bunch of tomato, onion, and chicken.

From what I remember, my mom just cooked spaghetti few times, it's like 4-5 times in my 19 years live with her! Well, you can say our family not a big fan of spaghetti. But because my brother suddenly bring back 3 big package of Spaghetti, I challenge myself to cook this dish:


Kind of different from what my mom used to cook. This dish called Beef and Parsley Spaghetti. I know it's sounds fancy, but yeah it is fancy (this is what we called with confidence in cooking).

I'm kind of inspired by mix in tomato and beef with Aglio e Olio (spaghetti with oil and garlic). And it turns out not bad.
So, here's the recipe:


Beef and Parsley Spaghetti
serves 4-5
cooking times: around 15 minutes
level: easy

1 pound of Spaghetti
1/3 cup of olive oil
4 cloves of garlic, minced
2 fresh red chilies, deseed and diced
1 fresh tomato, diced
1 cup thinly sliced beef
1/4 cup of dried or fresh parsley
salt and black pepper to taste
1 cup finely grated parmesan cheese

Instructions:
- Bring a large pot of lightly salted water to a boil, cook the spaghetti in the boiling water, stirring occasionally until al dente, around 8-10 minutes.
- While the pasta cooks, combine the garlic and oil in a large skillet over medium heat, stirring occasionally until the garlic softened and turns golden brown.
- Add in the chilies, tomato, and beef. Seasoned with salt and pepper.
- Add the cooked and drained pasta to the skillet, stir in the parsley, mix well.
- Transfer to serving bowl, Sprinkle on parmesan cheese.

PS: If you want the spaghetti to be spicier, stir in the chilies at once with the garlic.


It's seriously such a simple dish. It takes a few minutes to cook, super easy yet so delightful. Even my mom loves it to the moon. The chilies gives an extra kick to the dish, the beef is so tender, and the parsley gives a really nice aroma. It's a perfect simple dish to enjoy with your family.

Hope you try out this recipe and loves it to the moon just like my mom do. Take care, eat well and see you on the next post.


Friday, August 8, 2014

Milk and Milo Pudding

Who loves Milo?! I bet most of Asian and Australian love this chocolate malt powder. In my case, I grown by drinking this beverage every morning. Yes, every morning till I feel so sick with Milo. To a point where  my mom need to force me to drink the whole glass of Milo every morning.


But after I'm growing up, I drink mostly coffee and tea in the morning. And somehow... I miss Milo. OMG! I've said it! So, this time, I request to my mom to make a Milo Pudding. And it's soooo goood.. Taste like my childhood. Because my mom is just making the pudding without measurement(that's why the layer aren't that equally perfect). But lucky we got a instructions on the agar-agar box, so I can post the recipe. And at first I want to make the title as Milo Milk Pudding, but then I realized that the Milo layer itself isn't as much as the milk layer, so I reverse the name into Milk and Milo pudding.  I'm kinda confuse how to make this post. Haha. 

So, let's jump to the recipe.

Milk and Milo Pudding

Milk Layer:
3.5gr or 1/2 pckg Agar-agar
450cc Milk
60 gr of sugar or as your desire

1. Combine all Ingredients
2. Bring to boil, keep stirring
3. Pour into mould and let it cool

Milo Layer:
3.5gr Agar-agar or 1/2 pckg Agar-agar
450cc milk
60gr sugar or as you desire
60gr or 1/2 cup of Milo

1. Combine all Ingredients
2. Bring to boil, keep stirring
3. Pour into mould that already has the milk layer and let it cool

Serving:
1. Let it cold in the fridge
2. Garnish with some strawberries

Because of the milo, the Milo layer taste a bit more milky than the milk layer. Overall it's a good simple snack. And kids would love it too!

Hope you try the recipe, and don't forget to give me the feedback. xoxo


Friday, July 18, 2014

Chocolate Cookies

If someone ask me what is my favorite type of dessert, I will shout "CHOCOLATE". Yes, I'm so in love with chocolate. I eat a LOT of chocolate. Any type of chocolate, from white to dark. And this time I'm trying out a chocolate cookies recipe. Super decent chocolate cookies with a tons of chocolate in one cookie, coated with layer of melted chocolate, and decorated with sprinkles.

Pardon for low quality picture. I don't have any proper camera yet.
I get this recipe from my favorite food blogger, Sweetapolita. Since I'm not using extra dark chocolate, and I'm not a fan of super sweet food, I cut of the amount of sugar by half. For the type of sugar, the original recipe are using light brown. And I do have light brown sugar on hand, but usually I'm not using brown sugar on my cookies, just because i prefer a crunchier cookies. And yes, the cookies supposed to be soft and chewy, but my taste bud are more used to not too soft kind of cookies.

The appearance of the cookies might look different from Sweetapolita's cookies. My cookies have no crack on the top just like her cookies. I guess its because I reduce the amount of sugar. Or it might because I'm not beat the egg and sugar long enough. Because in brownie case, the crunchy skin at the top is obtained by beating the eggs and sugar as long as possible. Well, I'm still not sure what I did wrong here. But actually I don't mind with my cookies that has no crunchy top, the cookies still taste so good tho. Just in case you know why my cookies turn out different, please leave some comments. I would really appreciate your comments.


 I really love how the cute cute love sprinkle brighten up the oh-so-chocolate cookies.Anyway, I bake around 18 minutes but the inside of cookies is still soft, just like brownies. The amount of sweetness just right for my taste bud. And hey guess what?! Now I love soft type of cookies! Gotta try to bake this with brown sugar and bake only for 12-15 minutes. 

Okay, enough with talking. Let's jump to my version of the recipe, so you guys can try this at home.

Ingredients:
Chocolate Cookies:
280gr (1 1/2 cup) chopped chocolate
45gr (3tbsp) butter
100gr (1/2 cup) light brown sugar or sugar
2 eggs
200gr all purposed flour
15gr (2tbsp) cocoa powder
1/2tsp baking powder


Glaze: 
140gr chocolate


Decoration:
Any type of sprinkles

Instructions:
Cookies:
  • Preheat your oven to 160°C
  • Sift flour, cocoa powder and baking powder, set aside.
  • Melt 225gr of the chopped chocolate and butter over double boiler.
  • Beat sugar and eggs until incorporated, add the melted chocolate, stir well.
  • Add the dry ingredients. And stir in remaining chocolate pieces.
  • Drop the cookies on to the baking sheet.
  • Bake for 12-18 minutes
Glaze:
  • Melt the chocolate over double boiler.
Decorating:
  • Dipped half of the cookies into the glaze, decorate with the sprinkles.


I really enjoying making this first post of the blog. Hope you enjoy reading it and enjoy it as much as I do. Leave some comments for me. And don't forget to try the recipe!